
When I bought Tammy Norie in 2013 she had no battery. There was a wooden frame for a motorbike-sized battery in the cockpit locker.
I really wanted a larger battery — at least 70Ah — and Dad and I first put it here, in the engine locker.

It didn’t take much sailing to reveal what a bad idea this was. The engine locker is wet, and in heavy weather I noticed how much salt water was splashing around. I particularly remember accidentally pouring water that had accumulated in the locker lid on to the battery during my first time out in rough water (see Against the Weather). It wasn’t long after that I realized there was a very snug location for the battery inside the boat: under the cockpit.
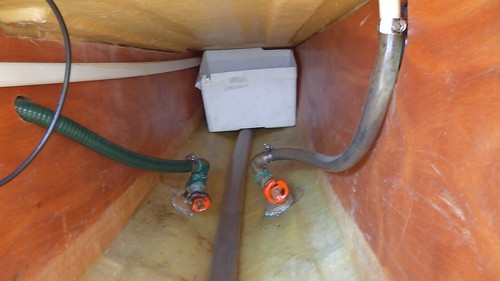
It didn’t take long to fix this up, and Tammy’s battery has been snug and dry every since. However, if you study this photo you’ll see that things are definitely not ideal, especially if Tammy were knocked down or rolled over.

The battery box, although snug, was essentially just sitting in the locker, on a slight slope, held in place by a block resting on the cockpit drain seacocks. It became one of those things that you must sort out “later”. I’m ashamed to say I’ve only really fixed the problem this year!
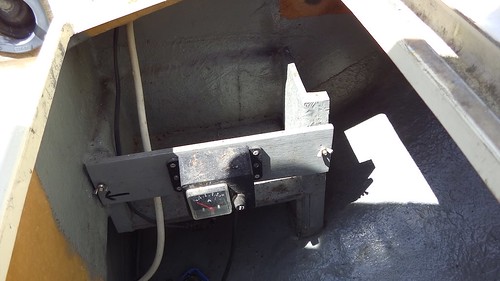
What mostly held me back was the idea that I’d need to build some sort of enclosing frame for the battery. For example, here’s the battery mounting (again, in the cockpit locker) from Sinobee:
Chris Boxer’s Emmelène also has a fine battery frame below the companionway. I’m sure I’ve taken photographs of it too, and will link them here if I find them! The thought of wood- and glasswork in the small space beneath the cockpit definitely held me back.
Over time I’ve become more and more interested in solving problems with “soft” solutions: more lashings and ropes and less rigid stuff. I realized earlier this year that I could just lash the battery in place. So I went to the chandler and bought a couple of small dinghy cleats, and and a length of shock cord and made this:
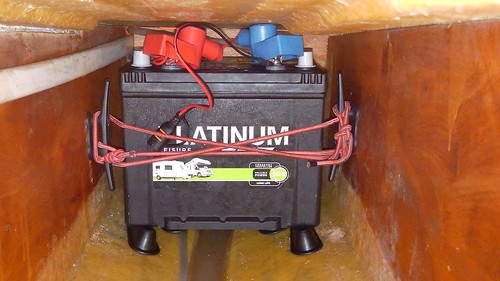
And yes, the battery is standing on rubber doorstops. I happened to have a few of these because I hoped that they might work as mast wedges, but unfortunately they’re much too weedy and hollow. I was very pleased to find a use for them.
This isn’t the end of the story though.
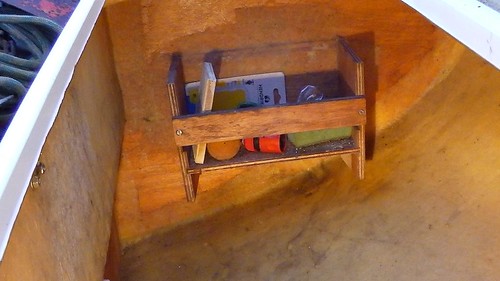
Firstly, for the curious, here’s what else goes in the volume under the cockpit in Tammy Norie. Forward of the battery go parts and spares. These live in watertight containers that I’ve (mostly) labelled clearly using masking tape and a big marker pen. It helps me find them in tricky circumstances. With this “system” you can swiftly yank out one box and the others tend to fall down surprisingly tidily.
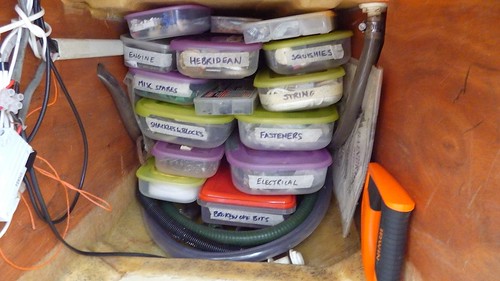
Forward of the parts and spares go the tools, in water-resistant bags. Tammy Norie is a floating workshop and I have a lot of tools. One day I’ll write a very long and boring post about them all.
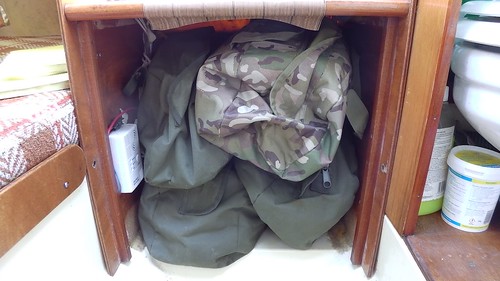
And then finally, forward of the tools goes the removable door with the companionway step.

Now, as part of the unsinkability plan I’m lining the boat with closed-cell foam. Here’s a sample 1m×1m×30mm of foam that I ordered from Lux Distribution.

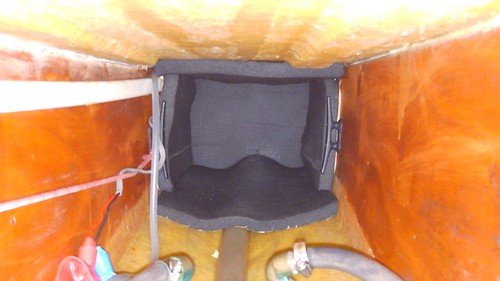
It was quite a simple matter to mount the battery in a foam compartment. Here’s the place before I started.

I have to say at this point that these pictures look bright because my camera has an efficient flash. In reality, the area under the cockpit has no light, and most of this work was done with a head torch. Also, this space is 30cm wide and 25cm tall! I have to get to it by shuffling forwards on my belly like a worm, with my arms above my head like Superman. There isn’t enough space to bend your arms once you’re in!
Anyway, the job was remarkably easy. Having measured the areas, I laid them out on the paper backing of the foam and cut it with scissors. I cut a bit out of the aft foam for the bilge pump pipe (like Superman, remember). I did not, at this stage, peel off the backing and stick the foam to the boat, and I may never do so for this job: the foam isn’t going anywhere and I want to get to the bulkhead for inspection and maintenance.
Here’s how it turned out.
It was then a simple matter to put the battery in the foam. I say simple, but in fact it involves wiggling into the area like a worm, arms forward like Superman, while lifting a 20kg block of lead and acid over the seacocks. And then you discover that the nice slippery plastic surface of the battery actually has very high friction with the foam, and you have to shoehorn it into place using an HDPE chopping board.
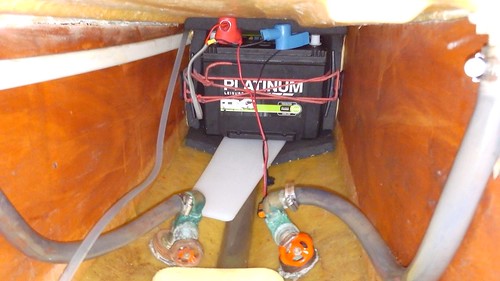
Once that was done I could withdraw the board and tidy things up. Here’s the battery finally in place and reconnected.

This is a very “soft” solution. The battery wobbles like a stiff jelly if you poke it. It’s being hugged in a gentle but firm manner by the foam and the shock cord. I’m very confident that it will stay put and working even if the sea picks up Tammy and gives her a good shake!
This was also a great opportunity to experiment with the foam. This foam is going to make up the bulk of the floatation I’m planning for unsinkability. I’m hoping to get most of that done this winter. Watch this space!
