Tag Archives: equipment

The Mantus

After my difficult passage from Sea Palling to Wells I decided to get a bigger anchor. I did not feel safe sleeping on my 6kg Bruce in a very shallow bay in choppy water in the remnants of a hurricane, no matter how tired I was. Well, I got a bigger anchor. A much bigger anchor.

I stumbled upon some quite impressive videos by Mantus Anchors on their YouTube channel. You’ll find plenty of people contesting their results in the comment section, but I could see this was at least a decent anchor. What really attracted me, though, was that it could be packed flat. I did a few measurements and ordered the largest I could fit aboard — their 11kg model. And when their European distributor didn’t have it in stock, Mantus shipped it from Texas at no extra cost!

IMGA0376

The only problem I had were the inconsistent nuts on this anchor. Not only were they Imperial — not surprising given it came from the USA — they weren’t all the same size!

IMGA0386

I replaced them all with 316 stainless M10 bolts, nuts, and spring washers from Sea Screw.

Initially, I kept the Mantus in this triangular locker forward of the mast.

IMGA0381

But then I realized I could pack it into the anchor locker alongside my 6kg Bruce, chain, and rode, so that’s where it lives now.

IMGA0383

Here you can see why this anchor is so great for Tammy Norie. There’s simply no way I could fit an equivalent-sized anchor in her locker. Especially not alongside her normal anchor.

IMGA0387

Using it obviously takes a little planning. You have to put it together with a spanner (one is enough) and transfer the chain and rode from the Bruce using a shackle key.  I have 10m of 8mm chain and about 40m of heavy anchorplait rode, that I joined with this splice. Yarrr!

IMGA0616

I’ve held off on posting about the Mantus because I have not really had a chance to test it in difficult conditions. I did use it when I left Tammy Norie at anchor for a week in Poole Harbour when gales were forecast, but she was also under the watchful eye of Tim McCloy on China Blue.

But after showing it off to Chris Boxer on Emmelène, I thought I might as well tell you all about it.

https://www.flickr.com/photos/41005368@N08/36293738631/in/album-72157684762453053/

3 Comments

Filed under anchor

Bungie Boarding

One of the greatest risks for a solo sailor is falling off the boat. When I’m sailing alone in all but the safest conditions, I’m wearing a lifejacket. I also clip on, especially when the autopilot or self-steering gear are engaged. What a nightmare it would be to fall in the water, away from shore, and see your boat sail away from you, suddenly freed of your weight!

Even if you’re clipped on it’s very difficult to get back aboard. When Tammy is at rest I’m able to haul myself up onto her side-decks, but not over the transom. And what hope is there that I could reach a side-deck if she’s sailing?

So I’ve taken an idea I’ve seen on mini-Transats: a permanently installed elastic step at the transom.

IMG_20170731_165523

The trick is to use some webbing tube threaded with elastic cord, strung across the back of the boat. The elastic should be taught to keep the line out of the way, but the webbing should be long enough that it forms a step that you can reach to get back aboard.

Here’s the step strung between the drogue attachments at on Tammy’s quarters. It should be fairly easy to reach from the water, even if I’ve had to haul myself along the safety line to catch up with the boat. The elastic keeps it out of the way of things like the self-steering gear.

IMGA0148

Here it is again with me standing on it.

IMGA0149

I’ve adjusted the length so that my waist is at the height of the pushpit rail, allowing me to bend forward and flop into the cockpit even if my arms are exhausted.

It’s one of those things I hope I’ll never need to use. It was easy to put together and might save me. I might even be able to test it (with some help).

6 Comments

Filed under Equipment

Solent Boat Jumble

I will be at the Solent Boat Jumble in Netley tomorrow with a boot load of boat bits to sell. (In fact, the same things I took to the Beaulieu Boat Jumble in spring!) Do let me know if you’re nearby.
image

2 Comments

Filed under Uncategorized

Building the Hebridean wind vane self-steering

I studied the plans I received for the Hebridean wind vane self-steering gear carefully. I really wanted to build the whole thing from scratch, but I realised that I don’t really have the time, especially if I’m to get used to sailing with it before next spring. So I ordered a kit.

IMGA0977

The kit still doesn’t allow me to just bolt together the Hebridean. It contains all the fastenings, some tricky-to-source bits, and stainless steel joints cut to length, but not to shape. I’m getting some American white oak for the frame and pendulum from Bamptons in Southampton.

John Fleming, designer of the Hebridean, said it could be built in a week or two if “you’re good at that sort of thing”. Well, I don’t know that I’m good, but I’ve taken a week off work from 2015-07-20 to get as far as I can. My goal is to have the self-steering gear working before August.

Progress will be interrupted on 2014-07-23/24 by a meeting of the Small Sailboat Club at Ashlett Creek.  I plan to sail Tammy Norie there from Fareham.  That’s a bit awkward as I have to both leave Fareham and arrive there near high tide.  I’m sure I’ll figure something out.

6 Comments

Filed under Constructing the Hebridean, Equipment, Plans, Repairs and Modifications, self steering

Wiring diagram

I’ve made this diagram (which is also on the “About” menu of this blog) in case anyone’s interested.

wiring diagram

wiring diagram

I’ll try to keep it up to date if anything changes. The only addition I’m expecting this year is a fixed VHF radio, probably a Standard Horizon GX2200 because it has built-in GPS and AIS, and so can provide me with a ship proximity alarm without any further equipment.

Here’s a slightly out-of-date picture of where the switch panel and most of the connections are located, under the bridge deck. The main difference now is that I have an integrated digital volt/ammeter that is much more responsive.

IMG_2888

17 Comments

Filed under battery, compass, Equipment, instruments

Plans for wind vane self-steering

If I’m to solo sail Tammy Norie any great distance I’ll need self-steering gear. I already have an electrical tiller pilot (a Raymarine Autohelm 1000 Micro Tiller) but it uses quite a bit of power and is quite noisy. Also, it’s a good idea to have backup.

IMGA0743

Wind vane self-steering is common on long-distance boats and especially junk rigged boats. It uses the direction of the wind and the forward motion of the boat to steer, keeping you going at a constant angle to the wind.

There aren’t many self-steering systems that will work on a boat as small as Tammy Norie. Roger Taylor uses the Pacific Windpilot Lite and swears by it. That was my plan too until I saw the Hebridean in an article in Practical Boat Owner. It’s a cunningly simple design that I can build myself at a fraction of the cost.

This appeals to me because I’ll learn a great deal by making it, and I’ll be able to maintain it myself. Saving half the cost of the boat is also important!

After quite a long correspondence with John Fleming I ordered a copy of the plans and they arrived today.

IMGA0727

Very exciting!

I’ll be documenting my progress with building and using the wind vane here on the blog.

18 Comments

Filed under autopilot, Constructing the Hebridean, Equipment, self steering

The solar panel

I’ve just written a reply to a thread asking about solar panels on the YBW forums, and I thought it’d be worth reproducing here for anyone interested.

I have a Nasa 20W through a CMP12 solar regulator to my Platinum SD685L 75Ah leisure battery, from which the main drain is the tiller pilot. I use the tiller pilot a lot as I’m usually solo, and the panel keeps up with the drain on a sunny day, and generally has no difficulty keeping up with the instruments and lights. My VHF is handheld and charged from the main battery occasionally.

I haven’t hooked up a sensitive ammeter and done the calculations yet. However, I do have one of these volt/ammeters with the ammeter in line with the battery and can highly recommend it. (I know then the solar panel is keeping up because the ammeter reads zero drain.) I filled the back of the meter with silicone electronic potting compound to keep the electronics from getting damp.

The solar panel was held down by duct tape on the aft locker for a lot of last year, but now it’s stuck down with a generous bead of Sikaflex. Nasa recommend this as a method. It suits me as it’s removable and doesn’t involve making holes in the boat, and especially not putting screws in the deck core, which you should never do.

Here’s a picture of the solar panel in its new position.  This spot is almost never in shadow.

IMGA0699

I just have to trim those Sikaflex blobs and clean off the old duct tape glue.

The wiring isn’t final either. I’ve looked at a few deck glands but there’s a fairly large connector on the other end of the wire, and I’d like to avoid cutting it off or making a hole in the boat. The wire actually squeezes nicely down the hinge side of the locker, so I might just fix it down (more Sikaflex) more or less where you see it, reinforce where it might chafe in the hinge, and then use some self-adhesive cable fixings inside to connect it forward.

6 Comments

Filed under battery, Equipment, Repairs and Modifications

Rubbing strake and series drogue

There’s a good title for my non-sailing friends!

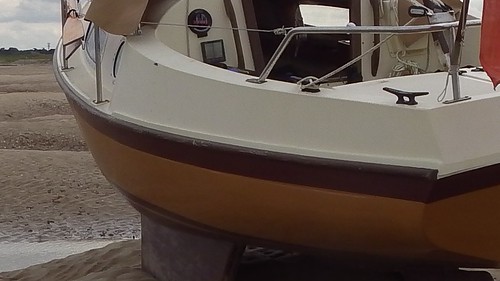
A rubbing strake goes around a boat to protect it from bumping into things. Like a car’s bumper or fender, you’re not really supposed to bump things with it, but it will help if you do, and it can be replaced more easily than repairing the boat. On Tammy Norie, the rubbing strake is two long pieces of a mysterious hardwood called “danta” that are screwed over the deck-to-hull joint — a place where you really don’t want to damage your boat.

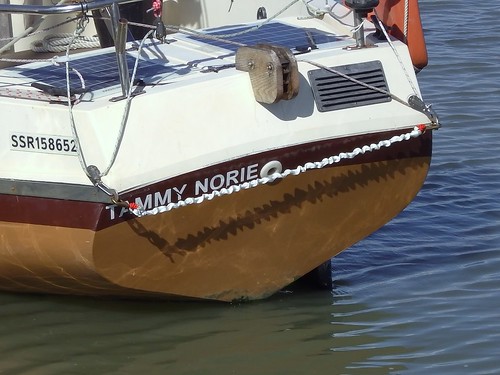
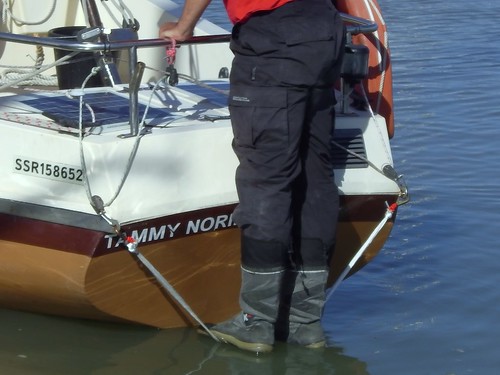
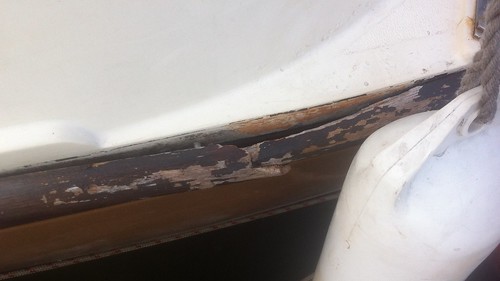
Here’s a picture showing the port-side rubbing strake.

IMGA0984 - Version 2

The problem I have is that the starboard-side rubbing strake has rotted where water has run off the decks. This probably happened while Tammy Norie was in storage in a garden for 25 years.

IMG_2995

So I need to repair or replace the starboard rubbing strake.

A series drogue is a kind of brake that you use to slow down your boat in a storm. In storms your boat can be turned over by big waves. It can be turned sideways to the waves and get rolled over, or it can plummet down the face of a wave, dig in to the next one, and get “pitch-poled”, turning head over heels. These things are pretty unlikely, but I intend to stay alive even if unlikely things happen at sea.

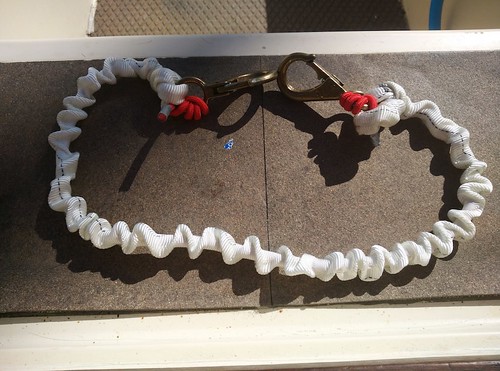
The solution I believe to be best is a series drogue: a long rope (over 90m) with lots of little cones on it that you drag behind the boat. Here’s a picture from a great article at sailboat-cruising.com:

The length ensures that the rope gets a steady amount of drag even when the water is being pushed in cycles by the waves. The drogue is attached by a bridle to both of the boat’s quarters (the back corners) so that it keeps the boat facing straight downwind, preventing it being hit side-on by waves and rolled over. US Coast Guard report CG-D-20-87 describes tests and recommendations and is quite an interesting read. Roger Taylor swears by the series drogue on Mingming — a very similar boat to Tammy Norie — and you can see him using his on YouTube.

So, what have these two things got to do with each other?

Well, you can imagine that there’s quite a serious amount of force on the boat from the series drogue when a wave hits. The coast guard report has a table with suggestions for larger boats. It doesn’t really extend below an 8000lb displacement, and since Tammy Norie weighs about 1 tonne I have to extrapolate a bit, but it looks to me that the table suggests a load of 5000lb or about 23kN. It further recommends that each attachment point be able to take 70% of the design load, which would be 16kN. So I want to be able to hang the entire boat off either attachment.

So where and how do I attach the drogue?

Tammy Norie has a couple of mooring cleats on the quarters. At the moment they’re just bolted to the deck with washers on the back. I already think they need reinforcing, but would I trust them to take repeated 10kN forces over a period of days with my life in the balance? I’m not sure that I trust any fixing at any point on the boat with that responsibility.

Another method is to attach chain plates (basically slabs of metal) to the outside of the hull to spread the load, bolted through to backing plates. This makes a sandwich out of a reasonable area of the hull and helps to spread the load. Oceanbrake will even supply some.

That would probably be OK, but it would be ugly and involve making holes in the boat. I think I can do better.

My first thought was to attach much longer chain plates underneath the rubbing strake. That way they would spread the load further, be attached to the hull-to-deck joint (a strong place), be hidden from view, and can re-use the existing holes that fix the strake itself.

But then it occurred to me: why not replace the entire rubbing strake with a stainless-steel strap? In fact, why not replace both strakes with a single strap that goes right around the bows? That would really be spreading the load. The boat would effectively be embraced by a very strong girdle, with very little load on the fibreglass at all. I’m certain you could hang the boat off that.

It would have other advantages. The hull-to-deck joint would be reinforced, and other things nearby (such as the stanchions, cleats, and anchor fitting) could be bolted to L-shaped backing plates that were also bolted to the strap. I could be pretty certain that they weren’t going to rip up bits of deck then, and could take heavy loads.

It isn’t even that expensive (about £100) or heavy (about 10kg).

How would it function as a rubbing strake? I’m sure it would protect my boat, but it might be antisocial, taking chunks out of other boats or docks. However, it would be quite easy to tap holes and screw a sacrificial wooden or rubber strake over the top.

I have an alternative plan: a rope strake. These are quite traditional. Here’s a lovely example on a dinghy.

This is potentially a simpler and easier way of replacing the strake and providing a strong attachment for a series drogue, but wouldn’t do anything to reinforce the hull-to-deck joint or other fixings.

I’d very much welcome feedback on these ideas.

7 Comments

Filed under drogue, Equipment, Repairs and Modifications

First tour of Tammy Norie

On the way from Shotley to West Mersea I recorded this little tour of Tammy Norie. Things mentioned:

  • boat layout
  • autopilot
  • solar panel
  • sheeting system
  • deck fittings
  • deck locker contents
  • sail trim
  • mysteriously long burgee halyard
  • oars
  • cockpit drains
  • Coromandel versus Corribee topsides and cabin layout
  • headlining
  • Plastazote® insulation and buoyancy foam
  • mystery flies

There’s plenty more to show for another time.  Let me know if you have anything you particularly want to see or know about.

5 Comments

2014-08-13 · 07:53

Wash kit and nose plug test

We finally got hold of a wash kit for Tammy Norie’s engine. A wash kit allows the engine to be flushed through with water from a hose (cleaning out salt) and also allows the engine to be tested out of the water. This gave us an opportunity to test the nose plugs we made earlier that prevent fumes blowing back into the engine compartment and cockpit.

Thanks to Martin at Hendy Honda Marine who helped to identify the engine and found the part in a warehouse in Belgium, as well as putting together a nice spares kit.

Leave a comment

2014-06-30 · 19:53