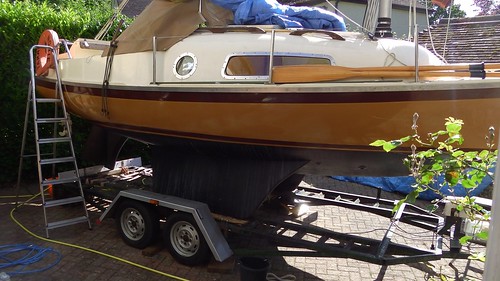
After drilling and welding the new stainless steel strakes it was time to mount them on Tammy Norie.
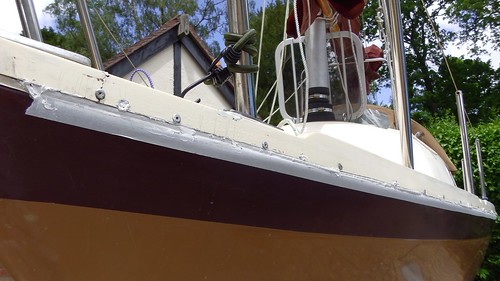
We drilled out the old rivets and so there are no new holes in her hull-deck joint. Instead I drilled the holes to 6mm the smeared epoxy filler inside. The idea is to correct for errors in hole positions, allow the machine screws to tap a thread, and seal the fibreglass. Correcting errors is important as it allows the screws to share loads when the strake is functioning as a huge chainplate for a series drogue.
I also dug out most of the old dirty mastic sealant in the hull-deck joint, finding several quite large voids on the starboard side. I sealed the gap with Sikaflex and carefully squirted plenty of extra up behind the joint and into the voids.
When the Sikaflex was tacky I folded a length of damp proof course padding in half so the fold was at the top and taped it approximately in position. The idea of this layer is to provide some protection between the hard steel and the softer fibreglass. (Also, if anyone asks what it is I can casually tell them it’s the damp proof course.)
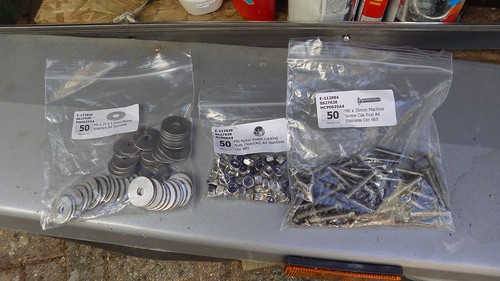
Suspending the strakes with bungees I pierced holes in the damp proof course, squirted some Sikaflex into the holes for a final seal, and screwed in the machine screws, tapping a thread into the epoxy filler. This was good enough to hold the strake tight while I added penny washers and nyloc nuts inside the boat.
Then I trimmed off the excess damp proof course by sliding a thin piece of aluminium behind it and cutting with a knife.
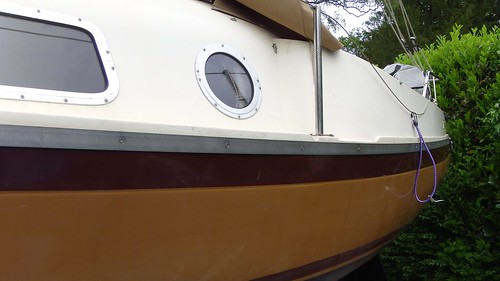
Finally, I scoured the strakes with an orbital sander to clean them up and give an even light grey lustre.
We’ll see how it all holds up over this summer. As I mentioned before, illness will be limiting my sailing this year, so it’s very unlikely the strakes will get a thorough loading test. I’ll write about any problems that do appear on this blog.
I drilled and fitted the port side strakes in Replacing the strakes (part 1) and yesterday I drilled and fitted the starboard side in one afternoon, having gotten the hang of it. It also helped that my cobalt steel countersink arrived. It cuts stainless steel like butter. I was able to countersink about 30 holes in seconds each, without any sign of it blunting. The only tip I have to share is that it’s a good idea to cut the entire depth you want fairly quickly in one push. If you stop the stainless steel hardens and it’s a little tricky to get started again.
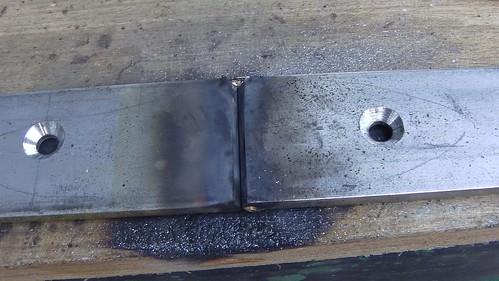
The next job was to join the two parts of the strakes on both sides. You may remember that we were only able to get 4m lengths of stainless steel bar, but the strake is 6.25m long. So the stern section is a full 4m and then we need to join the extra 2.25m. We decided to weld. Here’s an example of the joint before we started.
After a quick shopping trip for some safety equipment, Dad showed me how to set up the welding machine, and I did a couple of practice runs on an old steel tube.
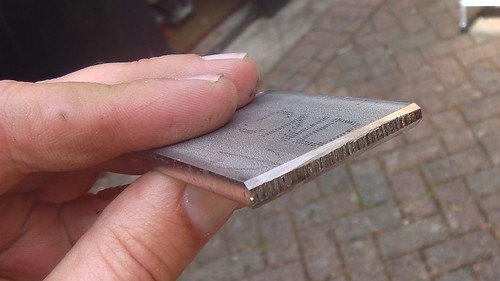
Then I took a couple of offcuts from the strakes and chamfered the ends to make slots to take new metal from the welding rod. The goal here is something of a compromise between strength, safety, and looks. I want to make sure the two parts of the strakes aren’t rubbing, and don’t have sharp edges or a slot to pinch skin or catch debris. The join will perhaps help to take further load from the series drogue or other attachments, but probably not very much. And finally, my goal is to make an invisible join.
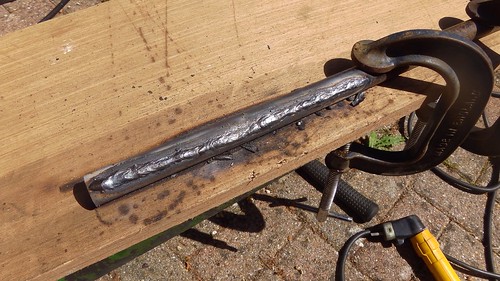
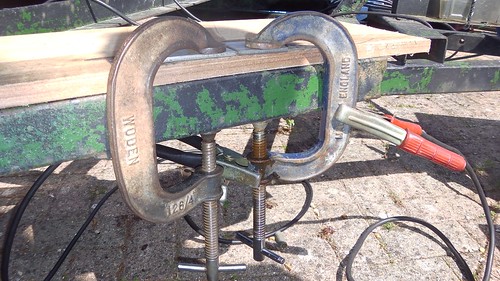
Here’s how we set up to weld, using a jumper cable to ensure current reaches both parts.
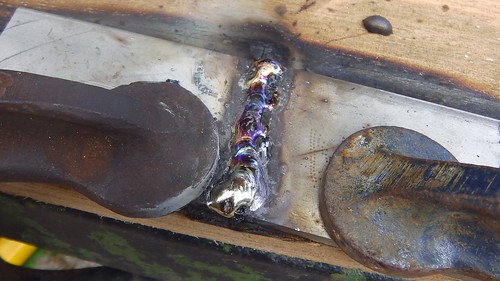
Here’s the result of the practice weld of stainless steel. Not too bad!
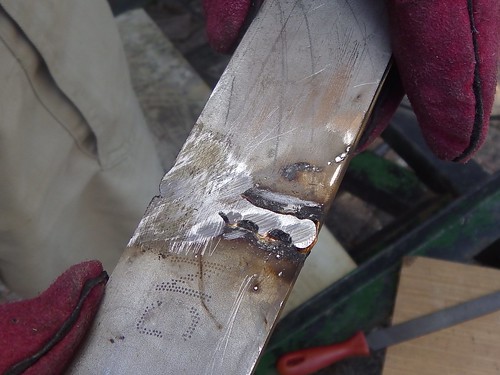
I experimented with grinding of various amounts of metal to see what kind of finish I might get.
We also attempted to break the weld by putting it in a vice and bashing it around with a hammer. We did manage to crack it slightly, but decided it was strong enough.
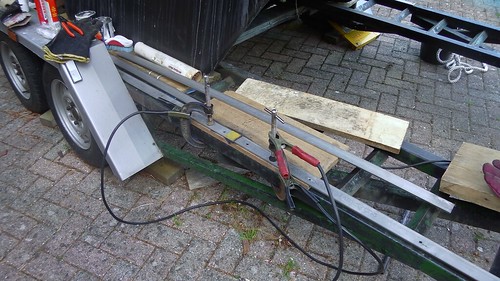
Then we set up the two parts of the starboard strake for welding.
Here’s what the inside of the strake looked like after welding and grinding. This side won’t be visible so we just have to make it reasonably level.
Turning over the outside was quite blackened by heat.
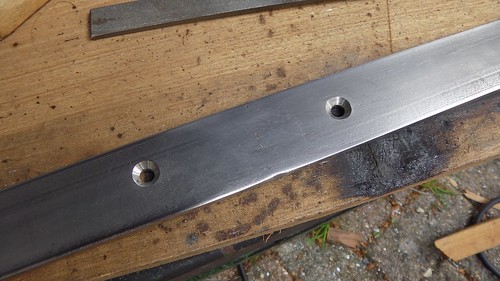
I cleaned it up, welded, ground, and roughly polished the outside.
Not bad, if I say so myself! Once mounted on the boat it’s going to be pretty invisible, especially when we polish the rest of the strake. It’s already hard to spot.
Tomorrow we will mount the strakes ready for a weekend launch!
I decided to replace Tammy Norie’s rubbing strakes with stainless steel bar, forming a bomb-proof chainplate for a series drogue and other attachments, as I described in my post Rubbing Strake and Series Drogue last August. Here’s a video about removing the old strakes.
The port side strake was secured by 25mm pop rivets that didn’t penetrate right into the boat. Instead the heads were buried in what appears to be a wooden strip glassed in on the inside of the hull-deck joint. On the starboard side the rivets were pushed right through and the heads were visible inside the hull.
Also on the starboard side there was a second set of sawn-off rivets hidden behind the strake! I suspect there may have been a cock-up at Newbridge and the first attempt at attaching the strake failed. The workmanship on the starboard side is certainly quite different from port.
We removed them on both sides by drilling the tops off with a 5mm bit, allowing the strake to come free, then either knocking through the remainder with a punch or drilling it out. Most of the holes ended up fairly clean, but some were a bit of a mess.
The same system could be used to put the existing strake back on, or replace it with another wooden strake. Since I’m using nuts and bolts I can make that choice later without further permanent changes to the boat. It’s basic engineering! This is one of the reasons I won’t ever use self-tapping screws or other non-removable fasteners. (And if that isn’t enough of a reason, see Attaching Hardware to your Boat by David Pascoe.)
The stainless steel bar for the new strake is 40mm ⨉ 5mm was provided by the friendly MG Metals for about £180. Unfortunately the maximum length they could provide was 4m, and the old strake is 6.25m long, so we plan to arc weld the strips together as neatly as possible. The total weight of the bar is about 18kg, so I reckon this modification adds about 12-14kg to the displacement.
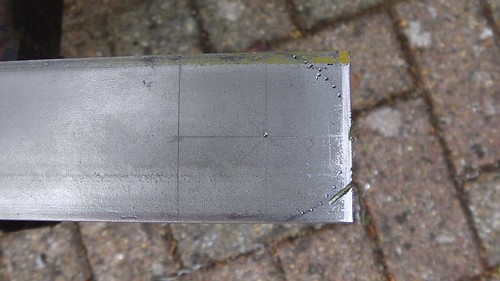
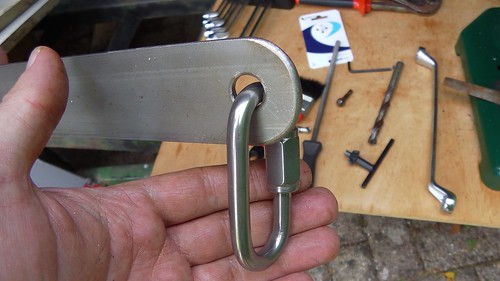
To make the drogue attachments I planned a 40mm overhang at the stern and marked out a semicircle to grind off so that there are no sharp corners. Here’s the marked bar end.
And here it is after a bit of hacksaw, angle-grinding, and drilling. That’s an 8mm shackle rated to over 40kN.
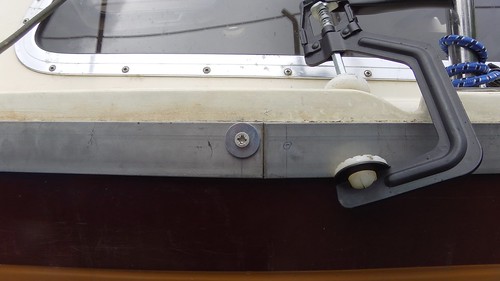
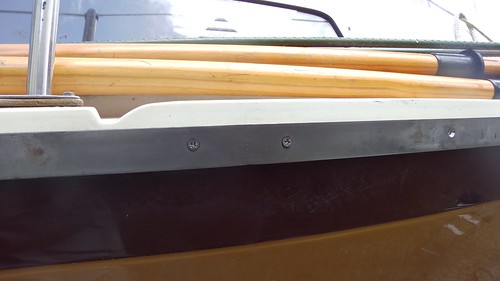
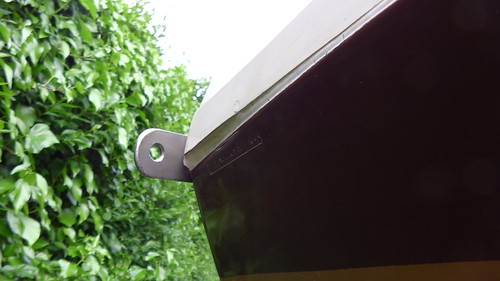
Here’s how it protrudes from the quarter.
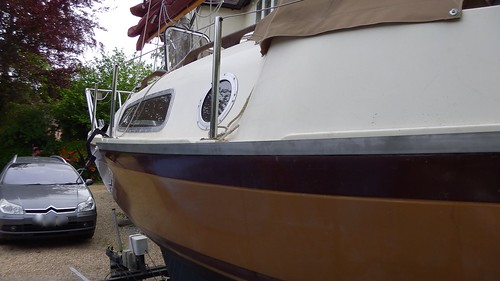
And here’s how the bar looks when held against the side of the boat, conforming to the curve of the old rubbing strake. In fact, we used the dirt line left behind by the old strake as a guide!
If you look carefully you can see that the bar is leaning outwards at the top edge. This is because the hull deck joint curves upwards as well as outwards, and the bar naturally wants to bend along its thinner axis. Later, we found that bolting the bar reduced this tendency, but not completely, so there’s about a 1.5mm gap at the top that will need to be filled with sealant.
In fact, I plan to trap a strip of padding behind the whole strake, to protect the hull from wear. The boat and strake will inevitable flex when sailing and there’s bound to be some rubbing. After investigating expensive double-sided foam tapes, I’ve decided to try some simple damp-proof course. I’ll see how it looks at the end of the season.
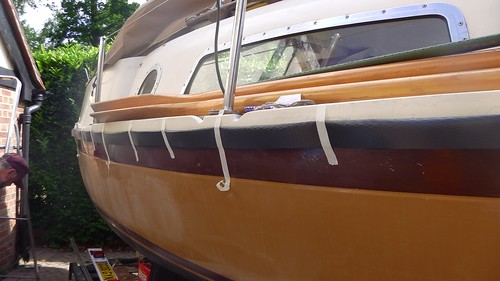
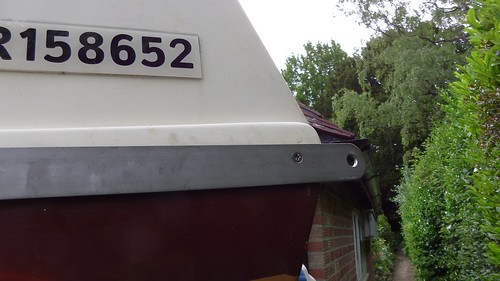
Here’s how the port aft section looks when screwed in. This isn’t the final job, but shows roughly how it will look.
I don’t intend to polish the strake to a mirror shine, but instead get an even “brushed metal” shine that should be easier to maintain.
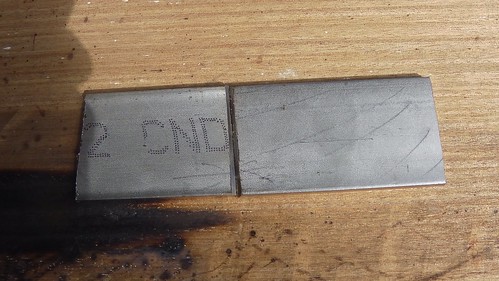
Here is the progress of the joint between the port aft and port forward sections of the strake.
As you can see the parts are butted together neatly. The plan is to chamfer the ends and then tack weld the ends while they’re on the boat in position. Then we’ll carefully take down the strake and form a proper weld on both sides, grinding down the filler metal until the weld is invisible.
A few notes about drilling. I’m using cobalt steel bits at low speed, as recommended by quite a few people on the Internet. This avoids hardening the stainless steel by heating. I bought some cobalt drill bits from a local supplier, DTC and they’re been excellent. We’re drilling using a standing press rather than a hand tool.
Making countersinks for the machine screws has been more of a problem. Countersinks wear out quickly on stainless steel, though we’ve had success sharpening them with a file every few holes. The countersink tends to heat and harden the metal and then start skittering over the surface rather than cutting. I’ve now ordered a cobalt steel countersink and I’ll report back on how that works out. One thing I can say is that the quite expensive countersinks from B&Q are complete rubbish and should be avoided. In fact I’m going to avoid all of their “PTX” brand stuff in future as it appears to be poor quality Chinese junk. Somewhat ironic, really, given that Tammy Norie is an imitation of a Chinese junk.
That’s as far as we’ve got at the time of writing. The port side bars are drilled and fit. Now I’ve got the technique I think I can drill the starboard side in about a day. Welding, fitting, filling, sealing, and polishing are adventures yet to come.