Category Archives: instruments

Little jobs roundup, 2017-09

Here’s a roundup of small jobs done on Tammy Norie in late August and early September.

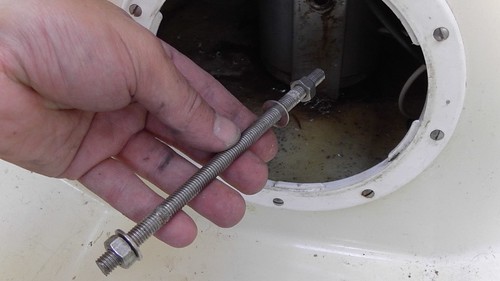
When comparing Tammy Norie and Emmelène, I suggested we drop Tammy’s mast and lift the mast stub. When we went to remove the retaining bolt, it snapped!

https://flic.kr/p/WTVrFA

IMGA0194

I cut a new bolt from stainless steel studding.

IMGA0673

I suspect the wear on the bolt was the main cause of the clonking sound that’s been gradually building up when Tammy is in rough water. This also gave us a good chance to look at the rather inadequate mast foot bracket.

IMGA0198

This is due for an upgrade later when I improve the mast step.

My engine starter cord snapped at an inconvenient moment on the way in to Portsmouth Harbor. I’d only just replaced it. This time I noticed that the cord was slightly melted. Moral: don’t use melty synthetic string for your engine starter. Use cord specifically designed for the job.

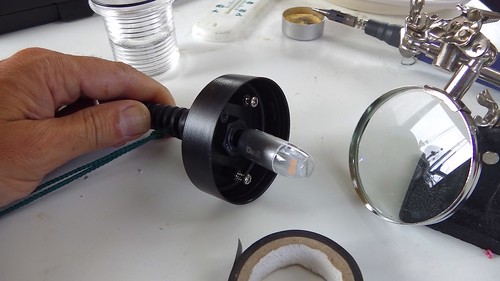
Replaced the incandescent bulb in my trusty utility lamp with a domestic halogen-replacement LED that I just happened to have knocking around. Half the power and a great deal brighter — possibly too bright.

IMGA0544

Replaced the coaxial connectors on my log and depth instrument. They were being to corrode and the log was unreliable. I had to dismantle the instrument and desolder the old connectors from the circuit board. I bought a pack of 10 replacement connectors from eBay so that should keep me going. NASA Marine were very helpful.

I am finding my new Iroda SolderPro 70 butane soldering iron very useful.

While I was doing that I fixed another problem with the instrument: it’s too bright at night. I couldn’t find a way to do this electronically, but I discovered that the backlight and the display are physically separate. I cut a piece of paper to slip between them and the display is much less dazzling.

IMGA0545

The charts in my Solent chart pack were getting dog-eared, so I’ve edged them all with Scotch Magic tape, which is nearly invisible and takes pencil marks.

IMGA0601

The bow light hack finally failed after two years. The LED replacement bulb fell apart somewhere inside so that the terminals no longer connect. This is probably because it was not designed to be shaken about on the bow of a small boat. I ordered a couple of made-for-purpose replacements, one of which is now in the bow. The other is a spare for either bow or stern.

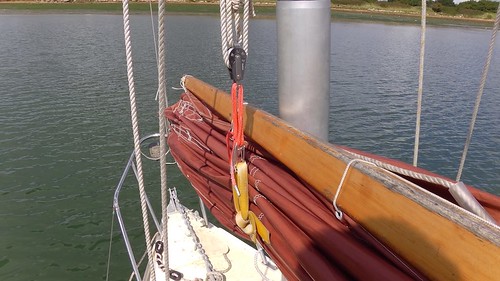
My mast lift is now a spare halyard. The mast lift is a loop holds the forward part of the sail bundle when the sail is reefed or lowered. Practical Junk Rig (fig. 3.49) has it as a single line from the mast head.
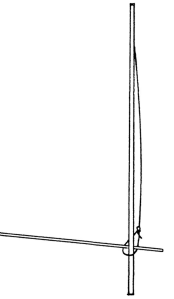
wp-image-1355314572

Practical Junk Rig figure 3.49

I’ve repurposed the enormously long “burgee halyard” that came with Tammy as a spare halyard in it’s place. I’ve felt the need ever since my halyard came off in the Waddenzee. Thanks to Chris Edwards for this idea. (The arrangement below is temporary until I make a new soft shackle.)

IMGA0622

I may re-rig it a shown in Practical Junk Rig figure 3.50b, using the spare halyard on one side, allowing me to reef upwards!
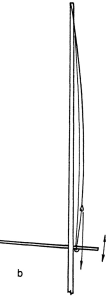
wp-image-1478996357

Practical Junk Rig figure 3.50b

I found and installed a pair of calibrated quick links for the series drogue. It’s surprisingly hard to find shackles that are rated for load, but these beauties are good for at least 12500N each, more than the weight of the boat, and more than the greatest expected load on the drogue. (The drogue still doesn’t exist, in case you’re looking for it.)

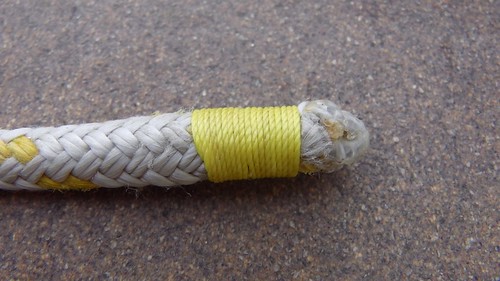
I whipped some rope ends!

IMGA0721

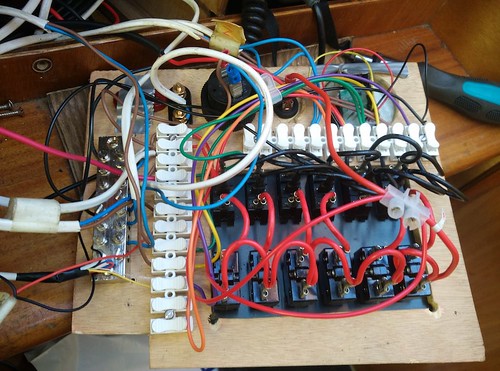
I rewired my switch panel using some new terminal blocks and rules: each piece of equipment goes to its own terminal, then switches are wired to terminals using colour-coded jumpers. Much neater, and a model for how I’ll do things when I remake the panel.

IMG_20170922_172631

Expect more small jobs next month.
1 Comment

Filed under electrics, engine, instruments, lights, mast, Repairs and Modifications, rigging

Radio mast bubbles

Before I set out on my Netherlands cruise I bought a main VHF radio for Tammy Norie. I got by all last year using a handheld Icom IC-M1Euro V (and very good it is) but I did notice the lack of range and the inability to talk to nearby boats, even though I was always able to get in touch with the coastguard. I was also thinking about AIS. When I want to sleep offshore I’d really like an alarm if a ship comes near. But I’m also reluctant to load Tammy Norie up with gadgets, in spite (or perhaps because of) my technical background.

AIS is also mentioned in Wild Song’s Final Reckoning as “possibly the greatest safety device of modern times”.

Then I found the Standard Horizon GX2200. This radio kills three birds with one stone. It’s a VHF, but it also contains an independent GPS, and it can receive and interpret AIS signals and warn of approaching shipping. Since it’s a DSC radio it can also buzz the radios of approaching ships even if they’re not listening on channel 16. This not only gives me a wake-up call if there’s a ship approaching, but a way of talking to them to make sure they’ve seen me. An extra GPS is welcome, of course.

I bought the unit not long before setting off for the Netherlands and tested it on board with the antenna in the cabin. I also thought about how to fit the antenna to the masthead and run the cable to the radio.

I noticed that the masthead had four tapped holes, but when I tried to fit screws into them I found that they were slightly smaller than 5mm and quite a bit larger than 4mm. Probably some imperial size. So my first step was to tap them to 5mm. I’d bought a small scrap of stainless steel strip from Percy M See in Fareham, and cut holes and sawed it into shape using the dock pilings at Rye as a workbench. This held the antenna nicely a little way from the forward side of the mast.

I could have just dangled the VHF cable down the inside of Tammy’s mast, it being a simple tube, but I realised that it would rattle around. Indeed, Marco on Stern was complaining about his cable doing exactly that. So I thought about ways to pad the cable. I also thought about buoyancy.

The top section of the mast weighs about 30kg. A quick calculation gave its interior volume as about 40 litres. If it were completely sealed, it would float! That was not likely to be possible, but I did think about packing it with closed cell foam, or air-filled bags. Then I realised I could use bubble wrap. It wouldn’t enclose the entire volume, but it would displace a lot of water, and delay water ingress, so that if I ever did drop the mast overboard I’d have a lot more time to deal with it. And if Tammy ever turned on her side or even turtle for any length of time it would help her to right herself.

I’d seen rolls of bubble wrap for sale at B&Q, but it turned out that Mum and Dad had a great big roll of it going unused in the attic. I’d stuffed it aboard Tammy Norie before leaving for the Netherlands.

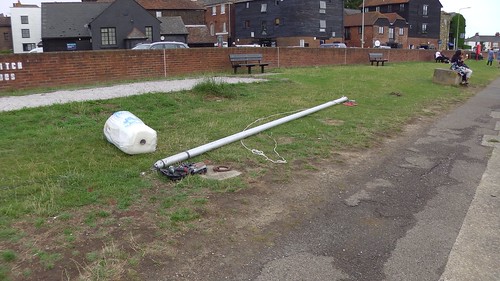
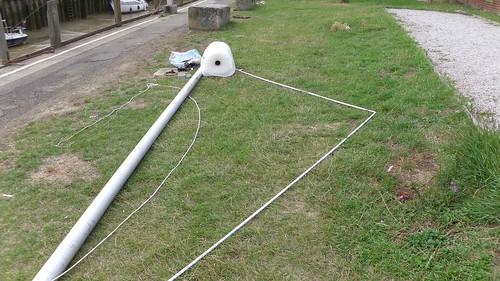
The first step was to remove the mast.  I used the low tide and high wall in the harbour at Rye to lift the mast using (appropriately) the mast lift.  Soon it was lying on the grass next to the boules pitch.

IMGA0616

IMGA0617

At this point a chap turned up and started asking questions about what I was doing and about Tammy Norie. He was Mike McCarthy, a local sailor with a wealth of experience and stories, who was maintaining his own boat not far away. He offered to help.

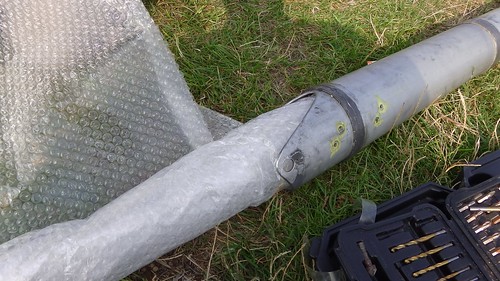
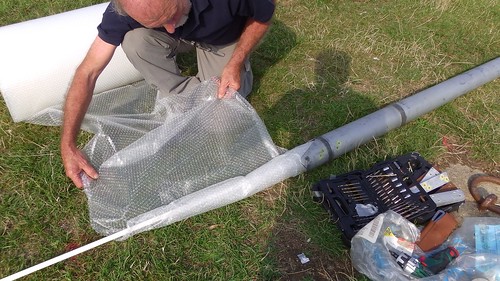
I visited Rye DIY, just along the street from Tammy’s berth, and bought two 3m lengths of domestic cable conduit. I joined them with duct tape. It was quite easy to arrange the bubble wrap around the conduit in a long helix and shove the whole thing up the mast.  The conduit helped keep the whole thing stiff.

IMGA0619

IMGA0620

IMGA0621

We then caught hold of the top end of the conduit through the hole at the top of the mast and threaded the VHF cable and a bit of mousing string through for good measure.  The mast went back down to the boat and we threaded the cable through the existing hole in the bottom section. I caught hold of it using a tool I’d made for fishing things out of CUYC Kestrel’s mast years earlier. I say “tool” but it was just a bit of bent coat hanger that I’d kept hold of.

By this time it was dark. Furthermore, a pair of enterprising gulls had broken into Mike’s shopping bag and eaten his dinner. We went and bought fish and chips and ate them aboard while swapping sailing stories. A great time was had by all!

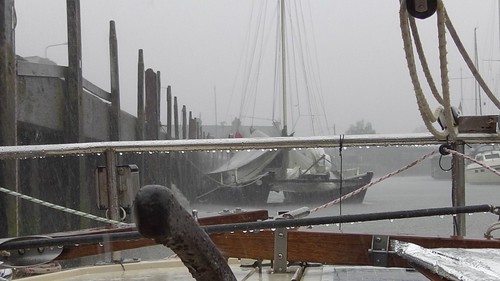
The next day there was torrential rain and thunder as weather fronts passed overhead.

IMGA0627

This was a good thing, as it signalled the change in wind direction I’d need to depart for the Netherlands.  I used the opportunity to finish the interior wiring and install the radio. It worked well, and picked up AIS signals from ships out in the English Channel some way away.

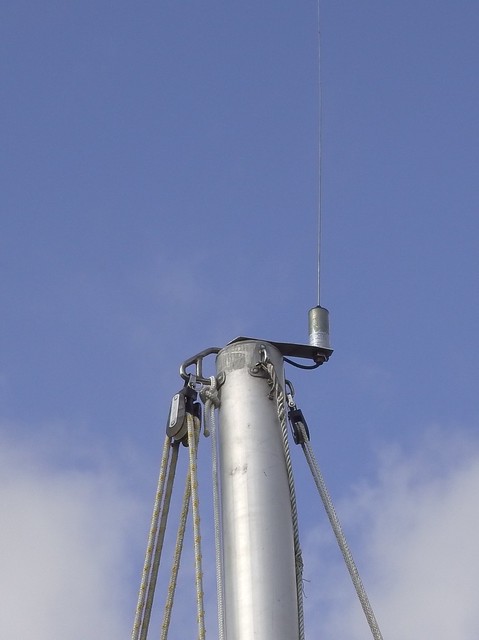
Here’s a picture of the masthead with the antenna in place, taken later in the trip.

IMGA0647

Now, what I’m not telling you is some of the mistakes we made.  We had several attempts at threading mousing string through the mast.  My first string was some nylon orange stuff that had come with the boat, dangled through the mast while still attached using some washers. This got snagged and broke. I tried with it again but it got worse. Then I bought some smooth string from Rye DIY and threaded that. Initially we pushed the conduit over the string and spent ages shaking it through using a weight made of a piece of wire. After getting the conduit and bubble wrap into the mast another friendly local then pulled the mouse out of the conduit, thinking this was somehow helping. Poor guy — he was very embarrassed. But eventually I realised that it was easy to push the thick VHF cable through the conduit anyway, so the mouse wasn’t really needed. We optimistically shoved the bubble-wrapped conduit up the mast and found that we could retrieve the end through the hold and just push the cable through. All of this mucking about took several hours.

Some of the stories that Mike and I swapped that evening involved people not telling the whole truth about how difficult jobs are on boats, but instead presenting a fait accomplis as if it were all easy and they knew what they were doing all along. It’s rarely so! Mike told me about a magazine article that described several weeks of faff and mistakes as an easy weekend job. I won’t name any names, but just be sure to take those articles with a pinch of salt. Sailors have plenty of salt available, after all.

4 Comments

Filed under antenna, instruments, mast, radio, Repairs and Modifications

Wiring diagram

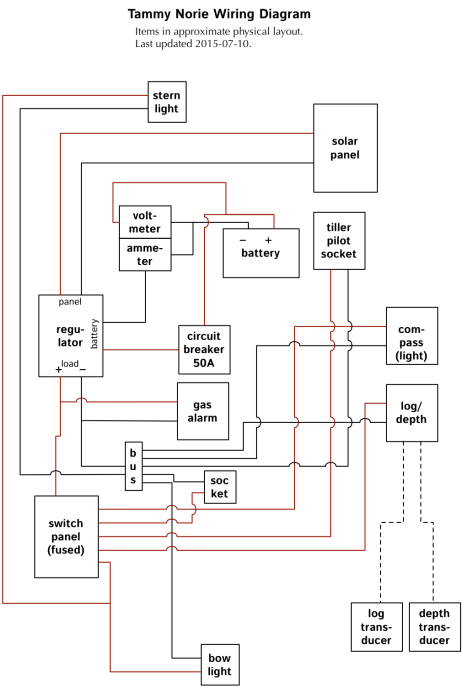
I’ve made this diagram (which is also on the “About” menu of this blog) in case anyone’s interested.

wiring diagram

wiring diagram

I’ll try to keep it up to date if anything changes. The only addition I’m expecting this year is a fixed VHF radio, probably a Standard Horizon GX2200 because it has built-in GPS and AIS, and so can provide me with a ship proximity alarm without any further equipment.

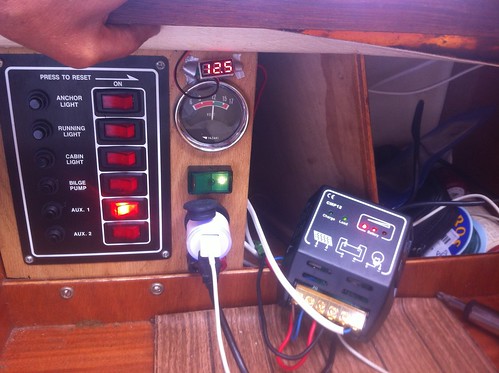
Here’s a slightly out-of-date picture of where the switch panel and most of the connections are located, under the bridge deck. The main difference now is that I have an integrated digital volt/ammeter that is much more responsive.

IMG_2888

17 Comments

Filed under battery, compass, Equipment, instruments

Fitting a log

Tammy Norie came without speed and depth instruments.  She must’ve had a depth sounder at some point because there was transducer in a pot of oil glassed into the hull in front of the mast step.

I took this along to Force 4 chandlery at Swanwick and they sold me a new combined speed and depth instrument, a Nasa Clipper Duet, which had a very similar looking transducer.  We tested this during the first weekend after launch and it worked just fine. Even better, it didn’t need a hole in the hull.

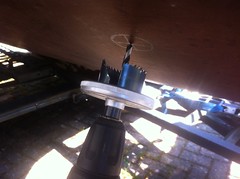
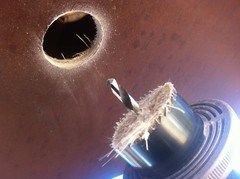
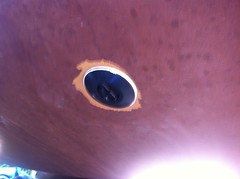
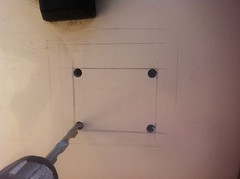
The speed transducer was a another matter.  I was very reluctant to make a new hole in the boat until I’d decided to keep her, so we left it off during that first weekend of sailing. Now that she’s back in my parents driveway I finally committed, after considering five different positions. I only hope I made the right decision. It’s in-line with the mast on the starboard side, not far from the depth transducer.

I used this video from WakeMakers as a guide to the procedure.  The tip with the magnet was particularly useful!

Of course, I had to make a second hole after much agonising about whether I might want a third instrument, knuckes on the grab handle, and what “level” means in a boat.

I don’t have a picture of the fitted instrument, but it works very nicely.  Surprisingly, the depth sounder also seems to have an accurate idea of where the concrete driveway is under the boat!

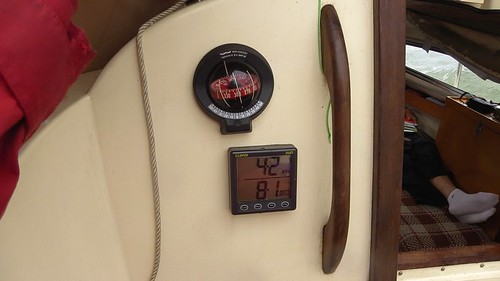
Edit: Here’s a picture taken weeks later while beating into a choppy sea off Felixstowe.

IMGA0418

Leave a comment

Filed under instruments, Repairs and Modifications